
| Home | Overview | Tutorials | Support | ||||
| Inventory | Stores | Search | Tools | ||||
| Home | Overview | Support |
| Tutorials | ||||
| Inventory | Stores | Search | Tools | |
Shopping
Choosing the Store
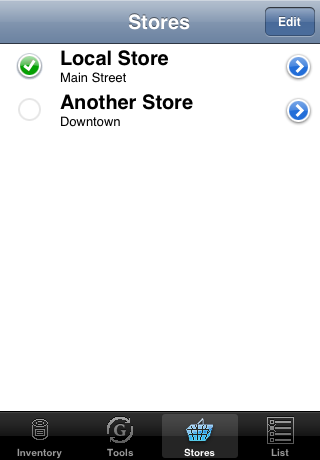
Before you begin shopping, the first thing you'll want to do is select the store you where you are going to shop.
If haven't entered the store you want to shop at into Grocophile, and you want to make shopping at this store more convenient in the future, create a new store by tapping on the button and hit the ![]() button.
button.
The Stores tutorial explains how you can quickly add all the numbered aisles and add items for other areas of the store. This may take a couple of minutes, but once you have aisles for the store, you can then assign items to aisles as you shop.
If this is a store you don't expect to shop at again, Grocophile can still help by showing your shopping list sorted by groups. In this case, you want to have no store selected. If there is a store selected, just tap the green checkmark to deselect that store.
Sorting the Shopping List
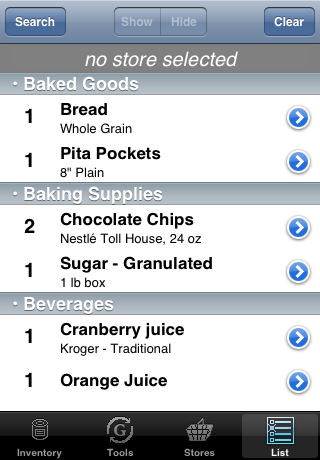
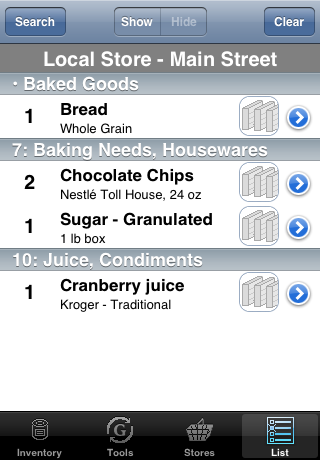
Grocophile is ready to help you shop even before you have entered any information about your local stores. Items that are in the shopping list but not assigned to aisles are sorted by their group. The same is true if there is no store checked in the Stores view. (See the image on the left below.)
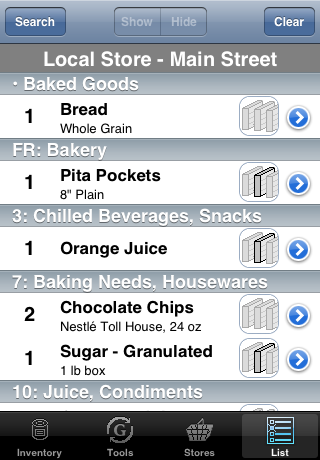
Once an item has an assigned item in the current store, it will be sorted by that aisle. (See the image on the right below.) Items can get an aisle by direct assignment, by its group aisle assignment, or by the inheriting the store's default aisle.
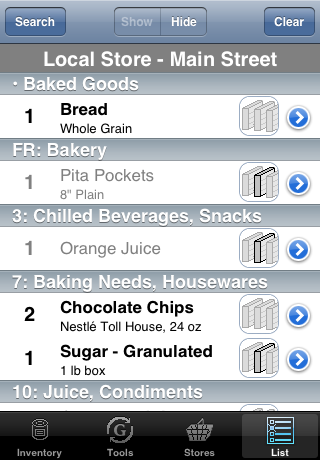
Marking Off Items
As you collect items at the store, just tap them. This will mark the item as complete and it will be shown in a light gray color to make it easier to see which items remain on the list. If you want to reactivate an item, tap it again.
If you tap the button in the center of the toobar at the top of the screen, the completed items will be hidden, making it even easier to manage the list as you knock off items. To see the completed items, just tap the button.
When you are done with the list, you can hit the button in the upper left corner to actually remove the items from the list; you'll be asked to confirm the delete and given the choice to delete all of the items or just the completed items.
Assigning Aisles As You Shop
In the screens shown in the previous section, you may notice that Bread and Chocolate Chips have slightly different aisle icons to the right of the text. These two items don't have a directly assigned aisle, Bread has no aisle assigned and Chocolate Chips inherited an aisle assignment from its group Baking Supplies.
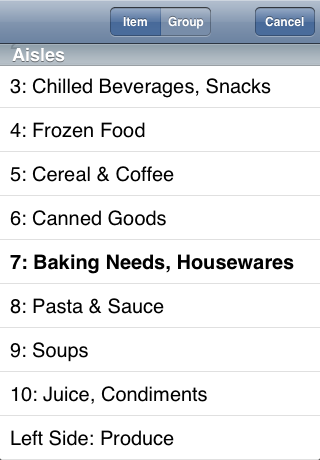
To assign an aisle directly to an item, tap the aisle icon to the right of the text. This will bring up the list of aisles for the current store. If the item inherited an aisle assignment from its group (or the store default), that aisle will appear in bold. Aisles that are set to hide their items will be shown with gray text. If the item has a directly assigned aisle, that item will have a check mark.
In this view, you can tap on an aisle to assign it to the item, tap on the button to remove the aisle assignment (if there was one), or tap the button to exit the view without making any changes.
If the item doesn't have a directly assigned item, then there will be a control at the top center of the view that will let you choose to change the aisle assignement for the item or for the group. If you change the Item/Group selector in the top center to Group, then the aisle you select will be assigned to the item's group.
Editing Items As You Shop
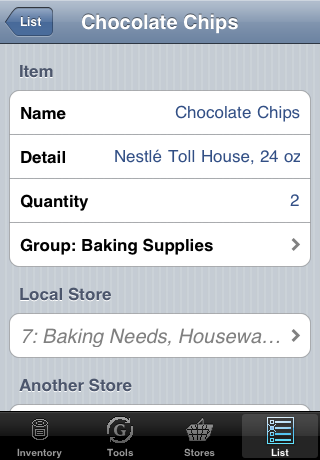
As you are shopping, you may wish to edit the items as they appear on the list, for example to add details, change quantities, or assign aisles. Tapping on the ![]() detail disclosure button on the right side of a list item will take you to the detail view where you can edit any of this information.
detail disclosure button on the right side of a list item will take you to the detail view where you can edit any of this information.
Tap on the blue text in the first first three entries to change their values. The quantity can be a simple number, or a measurement like 2lb. Tap on the Group item to move the item into a different inventory group.
Below that first group of items, you'll find a list of all of your stores, starting with the currently selected store. For each store, you can assign an aisle for this item.
Tip: You can save time assigning aisles to items by assigning aisles to the inventory groups. See Editing Inventory Groups for more detail.
Tip: Many grocery stores offer a printed store directory. Ask for one at your store, then you can assign aisles to your groups and items at home instead of while you're cruising the aisle with a cart.
Follow the link below to the next tutorial to learn about using the Search view to search through your entire inventory to find existing items and add new items.